Opel omega tuning is a great opportunity to modify the design of your car yourself. In 1994, this model of Opel cars became the best of all models produced in this concern. Due to the popularity of this model, spare parts for tuning and styling are still produced at the concern's factories in a large number of varieties. This not only improves appearance your car, but also to achieve significant improvements in the technical and running characteristics, and increase the aerodynamic properties of the body. This Opel model, from the beginning of its release in 1986 to the present, sets the design style and determines the level of comfort for all other models from this famous concern.
Tuning Opel Omega is:
- Increasing the comfort of the cabin;
- Modern durable details ;
- Increase in engine power;
- Durable and stylish bumper;
- Improved suspension;
- Contemporary alternative;
Aesthetic tuning Opel Omega B- one of the most discussed topics among specialists in the field of improving cars. The car lends itself quite easily to external changes, thanks to which even a novice in the field of modernization can remake the station wagon in his own way. We offer to consider the most popular methods for finalizing a car and doing it yourself.
1 Mounting bumper skirts - a step-by-step algorithm for beginners
As is the case with most other cars, body tuning Opel is not complete without the installation of additional elements. The choice of the latter in the domestic market is simply huge. On the one hand, this is good, because Omega owners have plenty to choose from, discarding the options they don’t like. But, on the other hand, inexperienced buyers are simply lost in all this variety of skirts and spoilers. As a result, elements are installed on the car that only worsen its appearance.
In order to avoid mistakes in choosing body kits, it is worth deciding in advance on the most suitable parts for Omega. These, first of all, include skirts and spoilers from the company Irmscher is a German manufacturer dedicated to producing quality parts at fair prices. The second manufacturer of parts, the products of which are worth paying attention to Opel owners, is the company Lester, parts of which are always reliable and easy to install. Another well-known manufacturer is the company Steinmetz. Despite the high quality of this company's products, the cost of tuning elements rarely exceeds 8 thousand rubles.

Tuning bumper Opel Omega B
Once you have figured out the elements suitable for improving your station wagon and bought a set of such body kits, you can immediately start installing them. In addition to a set of spoiler and bumper skirts, you will need:
- spanners;
- flat and Phillips screwdrivers;
- soldering iron and pliers;
- Bulgarian;
- masking tape;
- fiberglass;
- putty for plastic;
- dye.
First, we dismantle the Opel bumper and put it on a flat surface. We attach a skirt to it and mark those parts of the bumper that need to be cut off. As a result, we have to cut off about 5-8 cm of the standard Omega part. Next, take the pliers and tear off the factory fasteners. After that, you will have to put a new fastener and solder it. So the design will hold more reliably.
We put the skirt on again to make sure that it fits perfectly on the bumper of the station wagon. Next, between the skirt and the bumper, we apply a thin layer of fiberglass. We fix the elements with masking tape or tape and set aside for 2–2.5 hours. During this time, you can clean the part of the body in which the bumper is attached. After the parts are glued together, the structure must be puttied and painted. At the end, it remains to install the bumper with the skirt back to the Opel.
2 Installation of a wing on the roof of the Omega
The next stage of tuning will be the installation of the spoiler. For work, we need the same tools as when installing a skirt. First, we completely clean the back of the station wagon roof and degrease its surface. After that, we apply the spoiler at a distance of about 15 cm from the rear edge of the roof. If you put the wing closer to the edge, then it will interfere with the opening of the Omega trunk.

Omega roof wing
We remove the plastic plugs inside the spoiler struts and again apply it to the roof of the Opel. We take self-tapping screws and screw them into the racks. You also need to do this from the inside of the car. After installation, we check the reliability of fasteners. As a result of installation, the spoiler should firmly stand on the roof of the car. If you notice that the wing is dangling, then it can be additionally fixed with special glue.
It is worth noting that many drivers prefer suction cup spoilers. In addition to the considerable cost, such elements have proven themselves to be rather unreliable accessories. Over time, they simply lose stability and fall off on the go. Therefore, we strongly advise against buying parts with this mounting principle.
Opel optics tinting - protection and visual effect in one bottle
To improve the optics of the car, domestic craftsmen resort to a variety of options. The most popular methods are considered to be the installation of cilia and the replacement of regular lights with more powerful emitters. Each of these methods is either functional or aesthetic. However, there is a tuning option that combines both of these factors, and this is headlight tinting.
Before proceeding with the modernization, the owner of Omega must immediately decide on the method of doing the work. The first way is to buy and apply a special tint paint. Among its shortcomings, it is worth noting the difficulty in applying paint in an even layer, the fragility of the product and the inability to remove the tint if necessary.

Opel Optics Modernization The second and most optimal way is to apply an anti-gravel tint film. Let's look at the headlight improvement algorithm using the latter. First you need to completely remove the Omega optics, thoroughly clean the headlights and degrease their surface. Next, take the film and apply it to the headlights. We mark with a pencil the lines along which we will cut the product. Next, put the film on a flat, hard surface and carefully cut off the excess parts of the product with a clerical knife.
At the next stage, we separate the tinting from the paper base and begin to apply it to the headlight. First, we glue the product in the center of the optics and gradually apply the film to other parts of the headlight. After that, you will need to get rid of the air bubbles that formed under the tinting. To do this, take a spatula and gradually expel the air from the center to the edges. At the end of the application, you need to glue the protruding parts of the film to the back of the optics. In the end, it remains to install the finished headlights back onto the station wagon body.
4 Installation of moldings - to protect the paintwork of the body
In order for you and your passengers to stop scratching the car doors when they are opened near the curbs, we recommend installing protective moldings. Their main function is to be the first to contact solid objects near which you park your car. Thus, moldings absorb impact and protect Opel doors from dents and scratches.

Opel Omega with protective moldings Before installing the moldings, you need to clean the car body cover. After that, degrease the doors and put the car in a warm, ventilated room. Next, you need to take the previously purchased rubber parts and remove the protective tape from their corners. Under it you will see mounting tape - you do not need to remove it. Be careful - the film should be removed only at the corners of the moldings, and the masking tape should protrude 2 cm beyond the edges of the parts.
Next, you need to apply a primer to the cleaned area of the body, which will provide better adhesion between the body and the adhesive side of the element. Carefully apply the moldings and check their position. The parts must line up perfectly. If the elements have shifted, then they can be moved up or down. Next, remove the mounting tape by simply pulling on its edge sticking out from under the part. We press the molding to the door and hold it for about a minute. In order for the part to finally stick together with the Omega body, it is better to wait another day. After that, you can continue to operate the station wagon.
Aesthetic tuning Opel Omega B is one of the most discussed topics among car improvement specialists. The car lends itself quite easily to external changes, thanks to which even a novice in the field of modernization can remake the station wagon in his own way. We offer to consider the most popular methods for finalizing a car and doing it yourself.
1
As is the case with most other cars, Opel body tuning is not complete without installing additional elements. The choice of the latter in the domestic market is simply huge. On the one hand, this is good, because Omega owners have plenty to choose from, discarding the options they don’t like. But, on the other hand, inexperienced buyers are simply lost in all this variety of skirts and spoilers. As a result, elements are installed on the car that only worsen its appearance.
In order to avoid mistakes in choosing body kits, it is worth deciding in advance on the most suitable parts for Omega. These, first of all, include skirts and spoilers from the company Irmscher is a German manufacturer dedicated to producing quality parts at fair prices. The second manufacturer of parts, the products of which are worth paying attention to Opel owners, is the company Lester, parts of which are always reliable and easy to install. Another well-known manufacturer is the company Steinmetz. Despite the high quality of this company's products, the cost of tuning elements rarely exceeds 8 thousand rubles.
Tuning bumper Opel Omega B
Once you have figured out the elements suitable for improving your station wagon and bought a set of such body kits, you can immediately start installing them. In addition to a set of spoiler and bumper skirts, you will need:
- spanners;
- flat and Phillips screwdrivers;
- soldering iron and pliers;
- Bulgarian;
- masking tape;
- fiberglass;
- putty for plastic;
- dye.
First, we dismantle the Opel bumper and put it on a flat surface. We attach a skirt to it and mark those parts of the bumper that need to be cut off. As a result, we have to cut off about 5-8 cm of the standard Omega part. Next, take the pliers and tear off the factory fasteners. After that, you will have to put a new fastener and solder it. So the design will hold more reliably.
We put the skirt on again to make sure that it fits perfectly on the bumper of the station wagon. Next, between the skirt and the bumper, we apply a thin layer of fiberglass. We fix the elements with masking tape or tape and set aside for 2–2.5 hours. During this time, you can clean the part of the body in which the bumper is attached. After the parts are glued together, the structure must be puttied and painted. At the end, it remains to install the bumper with the skirt back to the Opel.
2
The next stage of tuning will be. For work, we need the same tools as when installing a skirt. First, we completely clean the back of the station wagon roof and degrease its surface. After that, we apply the spoiler at a distance of about 15 cm from the rear edge of the roof. If you put the wing closer to the edge, then it will interfere with the opening of the Omega trunk.

Omega roof wing
We remove the plastic plugs inside the spoiler struts and again apply it to the roof of the Opel. We take self-tapping screws and screw them into the racks. You also need to do this from the inside of the car. After installation, we check the reliability of fasteners. As a result of installation, the spoiler should firmly stand on the roof of the car. If you notice that the wing is dangling, then it can be additionally fixed with special glue.
It is worth noting that many drivers prefer suction cup spoilers. In addition to the considerable cost, such elements have proven themselves to be rather unreliable accessories. Over time, they simply lose stability and fall off on the go. Therefore, we strongly advise against buying parts with this mounting principle.
3
To improve the optics of the car, domestic craftsmen resort to a variety of options. The most popular methods are considered to be the installation of cilia and the replacement of regular lights with more powerful emitters. Each of these methods is either functional or aesthetic. However, there is a tuning option that combines both of these factors, and this is.
Before proceeding with the modernization, the owner of Omega must immediately decide on the method of doing the work. The first way is to buy and apply a special tint paint. Among its shortcomings, it is worth noting the difficulty in applying paint in an even layer, the fragility of the product and the inability to remove the tint if necessary.

Opel Optics Modernization
The second and most optimal way is to apply an anti-gravel tint film. Let's look at the headlight improvement algorithm using the latter. First you need to completely remove the Omega optics, thoroughly clean the headlights and degrease their surface. Next, take the film and apply it to the headlights. We mark with a pencil the lines along which we will cut the product. Next, put the film on a flat, hard surface and carefully cut off the excess parts of the product with a clerical knife.
At the next stage, we separate the tinting from the paper base and begin to apply it to the headlight. First, we glue the product in the center of the optics and gradually apply the film to other parts of the headlight. After that, you will need to get rid of the air bubbles that formed under the tinting. To do this, take a spatula and gradually expel the air from the center to the edges. At the end of the application, you need to glue the protruding parts of the film to the back of the optics. In the end, it remains to install the finished headlights back onto the station wagon body.
4
In order for you and your passengers to stop scratching the car doors when they are opened near the curbs, we recommend installing protective moldings. Their main function is to be the first to contact solid objects near which you park your car. Thus, moldings absorb impact and protect Opel doors from dents and scratches.
Opel Omega with protective moldings
Before installing the moldings, you need to clean the car body cover. After that, degrease the doors and put the car in a warm, ventilated room. Next, you need to take the previously purchased rubber parts and remove the protective tape from their corners. Under it you will see mounting tape - you do not need to remove it. Be careful - the film should be removed only at the corners of the moldings, and the masking tape should protrude 2 cm beyond the edges of the parts.
Next, you need to apply a primer to the cleaned area of the body, which will provide better adhesion between the body and the adhesive side of the element. Carefully apply the moldings and check their position. The parts must line up perfectly. If the elements have shifted, then they can be moved up or down. Next, remove the mounting tape by simply pulling on its edge sticking out from under the part. We press the molding to the door and hold it for about a minute. In order for the part to finally stick together with the Omega body, it is better to wait another day. After that, you can continue to operate the station wagon.
Opel Omega can rightly be considered one of the most popular cars Russian market. This is easily explained by the fact that buyers can purchase relatively inexpensive car with impressive features. Opel Omega has almost all the qualities that a modern car should have. vehicle, and applies to business class cars.


Tuning Opel Omega most often begins with replacing the original optics with a more expressive and interesting and massive bumpers with those that are more elegant.
Tuning Opel Omega A
The first Opel Omega A was released in 1986, production ceased in 2003. The car was distinguished by its excellent appearance and technical parameters, which were the main reasons for its high popularity. Many owners of this car strive to make it individual so that it differs from all others. It is for this purpose that the tuning of the Opel Omega A is carried out.


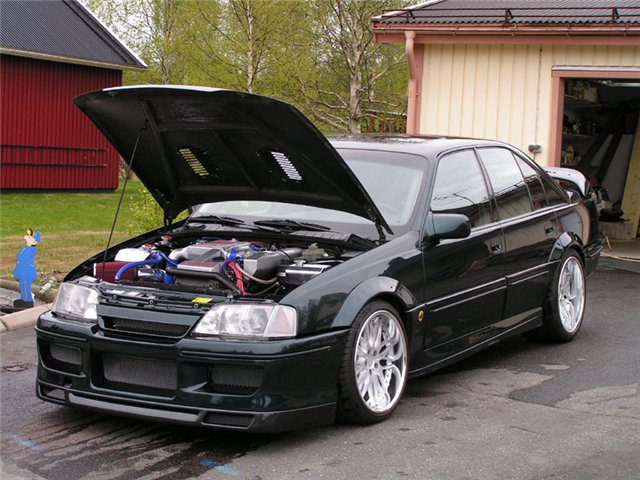
In order to make the car look more sporty and energetic, a new aerodynamic body kit is usually installed. New body kit parts can make the look of the car more expressive or completely change it. On the photo tuning Opel Omega, you can see that the appearance of the car can really become completely different, but at the same time, Opel-specific features will remain.


body kits for Opel cars can consist of such large parts as arch extensions, rear and front bumpers equipped with a diffuser, side skirts, hoods, bumper covers with carbon inserts. There are also many small details, which, nevertheless, also play a very large role. Such details include cilia on the headlights, spoilers, radiator grilles, LED headlights and some other small elements that have a decorative value.
Tuning salon Opel Omega
The velor interior, standard for all Opel, is best to be pulled over with modern materials, picking them up according to your own taste and financial capabilities. When reupholstering the interior, it is imperative to make sure that various regular boxes and pockets are preserved, which are located almost everywhere, from the backs of the seats on the doors to the armrests of the driver's seat.
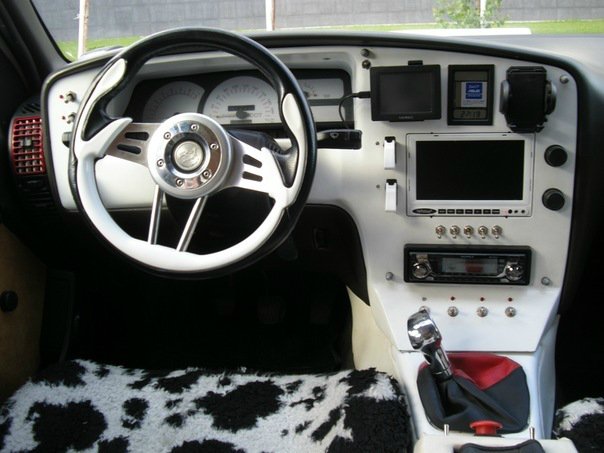


If desired, you can also replace the steering wheel, improve dashboard, install a new multimedia system, add some useful accessories to absolutely any car.
Tuning Opel Omega B
Opel Omega B has a good exterior design, which is more dominated by streamlined lines. Also the car is different spacious interior with a high level of comfort, multifunctional on-board computer, air conditioning and some other features.
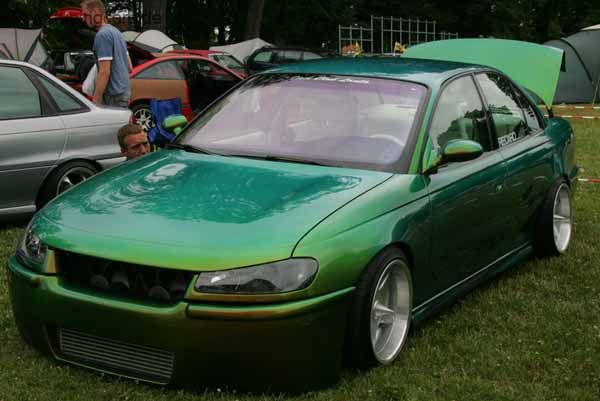

The tuning of this car is usually done in order for B to acquire an individual look. In order to quickly achieve this goal, you can install the original aerodynamic body kit, which will certainly be equipped with all the required details. It would not be superfluous to add original exterior mirrors, install eyelashes on headlights, door sills - as you know, these small details can greatly affect the appearance of absolutely any car. The appearance of this vehicle can also be changed by installing new wheel disks.


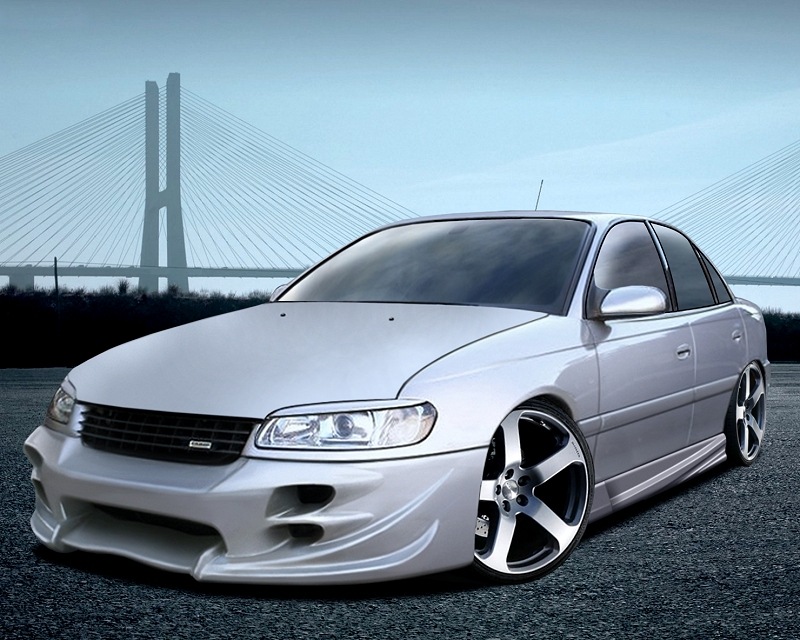
Tuning Opel Omega B rarely affects the interior, as the interior of the car usually suits any owner. However, to give the interior originality, you can make the upholstery of the seats with a different material, choose the right accessories so that the car better emphasizes the individual preferences of the owner. It is very important that the interior and exterior of the car are in perfect harmony with each other.
Most car owners are completely satisfied with the technical parameters of the Opel Omega B, which are really very worthy, but some car owners still strive to improve specifications his Opel. For example, to improve handling, shortened springs can be installed. Of course, any change technical parameters Opel Omega B, like any other modern car, must certainly be accompanied by chip tuning of the engine.
Opel omega tuning is a great opportunity to modify the design of your car yourself. In 1994, this model of Opel cars became the best of all models produced in this concern. Due to the popularity of this model, spare parts for tuning and styling are still produced at the concern's factories in a large number of varieties. This allows not only to improve the appearance of your car, but also to achieve significant improvements in technical and driving characteristics, and increase the aerodynamic properties of the body. This Opel model, from the beginning of its release in 1986 to the present, sets the design style and determines the level of comfort for all other models from this famous concern.
Tuning Opel Omega is:
- Increasing the comfort of the cabin;
- Modern durable details ;
- Increase in engine power;
- Durable and stylish bumper;
- Improved suspension;
- Contemporary alternative;


